

Gymnastics can look so amazing that it can be hard to comprehend sometimes that all of those difficult maneuvers that you see the gymnasts do all have their foundations on some pretty easy gymnastics moves. Learning these easy foundational gymnastics moves is an essential part of not only getting up to being able to do the more difficult things, but you need to be able to do them perfectly in order to be able to do the more difficult maneuvers well.
Some of the easier gymnastics moves that beginners can do are handstands, cartwheels, backbends, walkovers, splits, both forward and backward rolls, tuck jumps, candlesticks, and chin-ups on a bar. Perhaps the easiest one of all is called the pipe stretch, where you simply bend over and touch your toes.
However, easy can be a relative term. To someone who can walk around on their hands, doing a handstand can be almost ridiculously easy. One the other hand, to someone who can’t quite seem to get into a handstand position, much less hold it, doing a handstand can seem like quite a challenging feat. Knowing how to go about learning these different moves, even if you already know them, might be helpful to know.
How To Learn How To Do A Handstand
You may be able to already sort of do a handstand, and that is great. But, if you don’t then learning how to do one is actually very easy, it is perfecting it that gets a bit harder as you work to get your body to stay flawlessly straight up. The most common way to do this is referred to as doing a spiderman on the wall, which is a great way to learn but there are other ways that you can learn how to do this too.
In order to do a spiderman, you essentially lay or crouch down on the floor while near a wall with your legs pointing at the wall. Push up with your hands so that the front part of your body at least is off of the ground and then use your feet to essentially walk up the wall, keeping your upper body off of the ground with your hands.
As you get further up the wall with your feet, you also walk with your hands closer to the wall. Keep doing this until you are perfectly vertical up against the wall for support and then do the same thing in reverse in order to get back down. As you keep practicing with this you should eventually be able to move on your hands away from the wall so that you are not using it for support and still be able to hold yourself completely vertical for longer and longer amounts of time.
The other easy way to learn how to do this is to start on your bed or something a good bit off of the ground, you can be either face up or face down for this according to your preference. Reach down off of the edge down towards the ground and let yourself slide down until the palms of your hands are flat on the ground. Let the side of the bed support you as you raise your legs into the air to get fully into your handstand position.
Like with the other method, you can use your hands to move you a little away from the edge of the bed so that you are not using it for support as you work on lengthening the amount of time that you can hold your handstand perfectly vertical. Once you have learned how to do a handstand, you can add a bit more difficulty to it as you work to get into position without any supports.
How To Learn How To Do A Cartwheel
This is one that takes a lot of space to practice so that you run into anything. It can also be quite helpful if you get a running start, especially just at first. Even though it is fairly simple thing to do, the hardest part to get over is tensing up or pulling back some when you start instead of pushing yourself forward and into the cartwheel. This results in you ending up not making it the full distance and usually involves you landing over to the side.
To help with this you can do half of a cartwheel onto your bed or sofa in order to get used to feeling safe with throwing yourself forward. In order to do this you have to give yourself just the right amount of space so that you can go from standing sideways, to onto your hands on the floor just a few inches away from the sofa or whatever you are using to land on, and then fall over onto the cushions.
Once you feel quite comfortable in giving yourself the forward momentum that you need, it should almost feel as though you are throwing yourself forward onto your hands and then the cushions. Then you can practice this while trying to land on your feet instead of landing flat on a cushioned surface.
When you have gotten the basics of how to do a cartwheel down, the next thing that you can work on is to change this up a bit. You can do this by practicing different things like a cartwheel with only one hand, switching the hand you use so that it stays challenging. You will need to be able to do this later on anyway as you work your way up to an aerial which will require you to do a cartwheel with no hands.
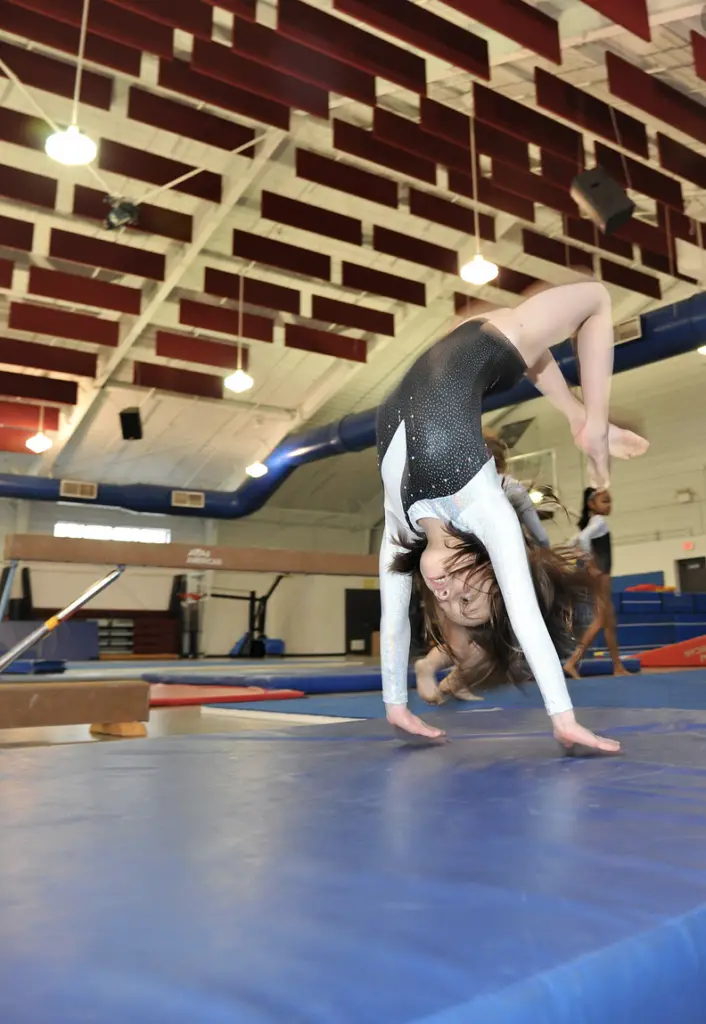
How To Learn How To Do A Backbend
There are basically two ways to go about learning how to do a backbend, both of which take two different approaches. The first way is to start by lying on the floor on your back. Bend your knees and use your hips to help push yourself off of the floor on that end while at your top end you place your hands down on the floor above your head with your fingers pointing towards your head and push up with your arms and shoulders.
While you may only be able to barely get the top part of your body off of the floor, or you may even struggle to do that much, practicing this a few times a day will help you to get better and raise yourself higher. At that point you can start trying to give your back as much of an arch as you can as you try to gradually work towards where you can move your hands closer to where your head is to start with and slowly keep going until you can put them closer to your feet.

You can also work on these muscles a little if you practice going from a backbend – or what little of a backbend you can actually do – and instead of letting yourself back down to the floor to get up, try to go forward with you upper body and into a standing position from the backbend. This can really help you get some of the muscles you will need for gymnastics.
The second way that you can learn how to do a backbend is to start from a standing position with a wall behind you. Stretch up with your arms as high as you can go and then tilt your head and arms back in order to place you hands on the wall behind you. Then, you should try to “walk” down the wall with your hands as far as you can comfortably go to in pretty much exactly the same way that you walk up the wall with your feet when doing a spiderman in order to learn how to do a handstand.
Once you have gone as far as you can, then you should try to hold it for a moment or two and then you can simply walk your hands back up the wall. If you can make the time to do this for even just a couple of times a day you should gradually find that you can get lower and lower down the wall until eventually you are able to reach the floor. Once you are there, try to get into and out of position without touching the wall at all if you can by gradually touching the wall for support less often.
Many people who don’t find that the floor is very comfortable to lie on, or simply find it easier to start from a standing position, view this as a great alternative option and prefer learning a backbend this way instead of the first way. It is undoubtedly easier to get into position if you only have a moment to spare than it is to get onto the floor to start.
How To Learn How To Do A Back Walkover
A back walkover is actually pretty easy to learn once you have learned how to do a backbend and are at least reasonably good at it. In order to start this you first have to be able to get into a backbend position without any walls or anything to help you. In order to start doing a walkover you should get into your backbend position with one leg going into the air as you do so.
Swing this leg up towards the ceiling as you try to jump off of the leg you are on so that both of your legs are in the air and moving toward the other side of your arms which are staying in the same spot on the ground. Both of your legs should swing around to the other side of your body where you land on first one foot, and then the other.
It can be a helpful idea if you keep your eyes on your hands on the floor since looking around while you are upside down can make you feel off-balanced and end with you falling over or something. When your second foot reaches the ground it should be right beside the other foot. This should mean that you end in a position that looks like you are bending over forward to touch your toes, only in this case your hands are instead touching the floor several inches in front of where your toes are at.
Once you have this, then you can work on doing the exact same thing in reverse for your forward walkover. Doing one and then immediately swinging back to do the other is a great way to practice doing both of them at once.
How To Learn How To Do The Splits
Learning how to do the splits is nothing complicated, it is simply something that takes a while depending on how far away from being able to them you are when you start trying. Basically all you should need to do is to get as close to doing the splits as you can comfortably manage to do with your arms on a table or chair as a brace so that you don’t pull a muscle by accidentally slipping down lower than you want to go.
By doing this a few times a day, holding it for a moment each time before standing back up, you will find that you are able to ever so slowly get lower to the ground until you are finally able to go all the way to the ground. The way that you perfect this even more and continue to work on these muscles is to first get into your splits, and then you should stretch to touch your toes first on one side and then on the other until you are able to touch them.
There are actually two different kinds of splits, however, a forward and a side split. A side split is what you usually think of when you picture someone doing a split. A forward split is where you do the same thing, but with one of your legs going straight in front of you and the other leg pointing straight back behind you.
How To Learn How To Do Rolls
A forward roll is something that is really easy to learn and that doesn’t require the same flexibility that most of the other things on my list need you to have. Simply start from a standing or squatting position, tuck your head down and put your hands out as you start to roll forward, and then keep rolling until you are back to where you started at. Sometimes it can be hard to get your roll going if you are hesitant to give yourself that push forward, so it can help if you start by leaning back so that you give yourself more momentum when you go forward.
For a backward roll, you start most often from a standing position and then you squat down. Then you roll backwards with your hands to help you take the weight off of your head and to push yourself the last little bit needed. As you make the last part of your turn your feet should be ready and pointing forward so that you land on your feet and come to a standing position like you started from.
Like the forward while, sometimes you can feel naturally hesitant at first to give yourself that push backward that you should have. This time you can start with leaning forward a bit and then rock yourself back for momentum. Both of the forward or the backward rolls should end in the same position that you start them in, however this can be standing up, squatting, or sitting on the floor.
Safety Tips That You Should Keep In Mind As You Practice
Safety when you are learning new skills is very important. The more flexible you get, the easier it will be for you to go just a little further, but getting there will take time. In the meantime you should never stretch beyond what is comfortable or you risk pulling or spraining a muscle. A sprained muscle can effectively keep you from working on what you are trying to learn until it gets better, not to mention that it will hurt for a while.
Always, when you are trying to learn something new or to increase you flexibility in a certain area you should first warm up the muscles in that area. There are a wide variety of stretches and warm ups that you can choose from, but whichever ones you choose it is important that you do them before each practice session.
Warming you muscles up is in a way like waking them up and getting them ready for use. This helps prevent you from pulling a muscle wrong. When your muscles have been warmed up, they also get limbered up a bit too, which means that it will be easier to do what you are trying to accomplish with them.